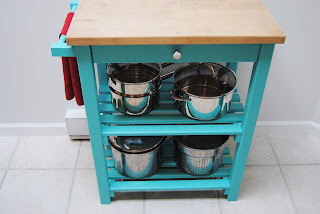
for you xoxo
at 25, i've finally left the nest and moved into a beautiful apartment with my darling boyfriend. in the three months that we've lived together, we have turned an empty space into a loved home...on a pretty banging budget too...
Friday, 2 November 2012
little miss tiffany
Tuesday, 25 September 2012
bedside table for him
ok so here is the boy version of the nightstand! jesse bought this 'very cool' rustic wood lamp from the thrift store. a super great find. i think it works nicely with his faux wood alarm clock...which he may have gotten from a special someone on his birthday.
i'd say our little nightstands are quite the couple!
Thursday, 13 September 2012
bedside table for her
i love the idea of his and hers things...i know it can be cheesy, but when you try to make a home that is 'gender friendly' i can't help but miss shiny, sparkly and frilly things. so i decided to fem up my bed side table and let jesse man up his. we have the same side tables, but different lamps and other things that don't really need to be on our side tables. below is mine...i'll have to post his another time as i never thought to take a picture of it...oops!
i had a cake stand and a little bell jar from a few years ago...i'll be honest...i've never used it for it's primary purpose. so i stacked all my bangles in the bell jar and draped my necklaces around it on the cake stand. it's definitely sparkly and shiny and screams that it's my side of the bed:)
jesse bought me flowers last christmas...they were perfect. so i've kept his little note ever since and it sits on my nightstand. also, i played up the stacking books to get some variation in height. i actually do read the books on top...but those lovely art books that everything sits on might be getting a little dusty...but it looks nice!
Tuesday, 11 September 2012
for the love of peonies
i used to work in a beautiful little flower shop before going back to school and starting the rest of my life. unknown to many people, working as a floral designer can be incredibly stressful. it's a constant battle against time when working with delicate perishable product for weddings, events and holidays. for a while seeing flowers stressed me out, but i've slowly gotten over that and find that our little place looks more complete with a pop of green or natural color.
the unfortunate truth about flowers is that they don't last forever, so i wanted to get a larger vase that could stand on it's own between fresh bunches of joy. i found this vase at the thrift store (surprise, surprise) for $9.99. not a great thrift store price but i had limited options. it was great as it was...but we have enough dark colors in our place and i felt that white would contrast nicely...and would compliment many types of flowers. this was easy peasy. just a few coats of white paint. i only painted the top third of the inside because i wasn't sure how the paint would hold up against the water...no one's going to look in there anyway!
here's my bit about flowers...go as simple as possible. all flowers are loveable...but some lose their cool when they are mixed with others. just buy a 'bunch' or two and say 'no filler please'...and try to buy flowers that are in season - that way you get a better price and a better chance of buying local.
the before
the after (check out the table too!)
let's also take a minute to love peonies
Thursday, 6 September 2012
navy anchored table
this was one of my first projects and still one of my favorites. it's also the piece that my boyfriend likes to show off the most whenever we have new guests over. it makes me happy:) anyway, i bought the table from the thrift store (a place I go very often...it's only two blocks away...and it's a good one). i believe it was $6.99. i'd call that a steal for furniture in thrift stores these days. it was the perfect size to fill the awkward space between our couch and leather chair in the living room. we have a coffee table, but we just needed something extra on the side to fill space, put a vase of flowers and rest a good old cup of jo. simply painting the table seemed a tad boooring...so i decided to make my own stencil...similar to the chalkboard. here's a play by play of how i did it:
1. the before
2. i gave the table a couple coats of paint (i used a house paint that has the primer and color in one)
make sure to flip it around to coat all the cracks and corners
3. i made the most simple. stencil. ever. i sketched out an anchor by hand, but for those who are shy about drawing you could always print something off your computer. the paper i used was from my sketchbook- so probably a little heavier than your standard letter paper...but i'm sure the standard paper would also do the trick. i used a craft knife to cut our the shape and voila...a stencil! just remember that if you have innards... like the ring at the top of the anchor...make sure you keep it somehow fastened to the outtards...that way you don't lose the shape!
4. tape down your stencil and start painting. be gentle...i use the dabbing technique with a sponge brush...and help hold down the stencil with your fingers. it can be messy, but this technique lets you get away with using a homemade and FREE stencil.
5. and the after. YAY! the framing around the anchor was super simple, but does require a lot of measuring. i just used a painter's tape and painted in between. again, be gentle with the paint to keep the edges as clean as possible.
6. and there she is...in her little corner next to the couch and chair...just bridging the gap!
Tuesday, 4 September 2012
a touch of paint
i'm not even sure what these are...nor what to call them...but rumor has it my grandmother made these some time ago. i've always remembered them and they somehow ended up in a box with my name on it in the depths of my parents' basement. i saw their potential but couldn't get past the faux wood/over glazed/awkwardly brown frame. easy solution? some good old navy paint leftover from the accent wall in the living room. now they're on display on a cork board (among other things) in my studio. dee lightful.
kitchen chalkboard
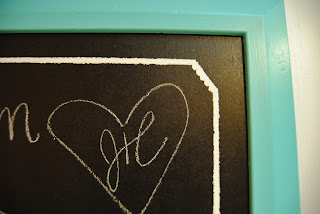
our kitchen was lacking a little color...a couple of cherry red tea towels and a tiffany blue utensil jar just wasn't cutting it...so i strolled up to the thrift store and bought an old ikea frame (for $4) to make a diy chalkboard. i painted the backside of the frame's backing with chalkboard paint and painted the frame a tiffany blue. once the board was dry, i created a white frame around the board using painter's tape. i cut the corners using scalloped scissors to add a tad more texture. the board went back in the frame and now i have a touch of color in the kitchen, and a great place to write down a list of needs. it's also a great place to leave
love notes:)
love notes:)
Subscribe to:
Comments (Atom)


